I’ve been gardening pretty much all my life and each year about this time I start thinking of what I would like to grow and where in our garden space I want to plant it all.
Even though we still have lots of snow on the ground here in February, it hasn’t deterred my desire to get a garden started.
So how do you plan your garden for success?
I plan my garden on paper, know my plant hardiness zone, utilize Polyculture, Companion Planting and Square Foot Gardening.
I’m itching to get out into the garden and start planting all those lovely tomatoes, lettuces, carrots, spinach, onion, cucumber and well…you know, all the wonderful garden produce we have come to enjoy fresh from our garden.
There’s simply nothing better than the taste of freshly grown produce from your own garden!

Maybe you haven’t had the chance or desire to grow healthy organic produce yet but would like to get started.
By following what I have done for years you too can have a successful garden!
First Steps To Plan Your Garden
To start your garden you need to find a good place on your property for your garden where it will get at least 6-8 hours of sunlight.
Determine this by watching where the sun is at different times of the day.
Decide how large you want your garden to be and what kinds of plants you would like to grow.
I find that the easiest thing for me is to actually plan my garden on paper.
It’s a good way to determine how much space you have to work with more precisely.
When planning my garden this way it also gives me a better idea of how many different varieties of plants and how many of each plant that I need to start indoors.
For our plant hardiness zone I find we need to start several different plants indoors ahead of time since our planting time is somewhat short.
Determine the best time to plant for your area and also which plants are better suited for your plant hardiness zone by using a Plant Hardiness zone Map.
The 2012 USDA Plant Hardiness Zone Map is the standard by which gardeners and growers can determine which plants are most likely to thrive at a location.
The map is based on the average annual minimum winter temperature, divided into 10-degree F zones.
https://planthardiness.ars.usda.gov/PHZMWeb/
One strategy that can improve your garden’s production is to schedule the planting before your area gets its first hard frost.
To do this, identify the approximate date of your first killing frost using an Almanac and plant before that time, counting back the number of days that’s needed for your plants to mature, mark your calendar and plant then.
Your seed packets will tell you the amount of days that’s required until harvest.
Of course, every year the weather varies so there’s no guarantee of when the first killing frost will be but it gives you something to go on.
By incorporating things like greenhouses, hoop houses, tunnels and row cover cloths you can help to decrease the chances of losing some of your more tender plants to a hard freeze.
You can find the free plans on how we made our hoop house in, “How To Build A Hoop House Style Greenhouse On A Tight Budget.”

Planting frost tolerant and cold hardy plants such as Sweet Peas, Forget-me-nots, Sweet Alyssum, Broccoli, Cabbage, Carrots, Onions, Turnips and Kale for instance will not only give you a few things to harvest still but can also add color to your garden that has already started to look a little dreary in late Fall.
To Till Or Not To Till, What Is Best?
Like a lot of people we always gardened the traditional way, tilling the ground and planting in rows until the time came for a few years when we didn’t have much space to grow in.
We turned to growing in raised boxes or small beds sitting on the ground and pots that were determined by where we were living at the time.
Here on our homestead we have found that its easier to grow in raised beds because of poor soil that has a lot of fairly large rocks.
Some of our beds are raised up off the ground for even easier gardening which I love.
I’m always looking for better ways to grow our own organic produce that’s full of good nutrition for us.
In my search I’ve found that by not tilling your soil you are allowing the natural life that is in the soil to thrive if fed properly which results in healthier organic food for you and your family.
By tilling, digging or turning the soil it disturbs the micro-organisms and…
…destroys the fungal networks and the sticky exudates of soil organisms that hold soil together.
Tilling also destroys humus, the organic component of soil that is necessary for plant life.
This results in the need to add more soil amendments to compensate for what nature would have done for free.
https://www.tenthacrefarm.com/2015/11/transitioning-to-a-no-till-garden

Using raised garden beds or beds you have made on the ground where you will not be walking on the soil works great for the no-till way of gardening.
Raised beds should be just wide enough that you can reach all the way across it without needing to climb into the bed if its up against a wall or fence.
Being able to reach half way across the bed easily where there isn’t any wall or fence against it is a must.
Getting More Food From Your Garden
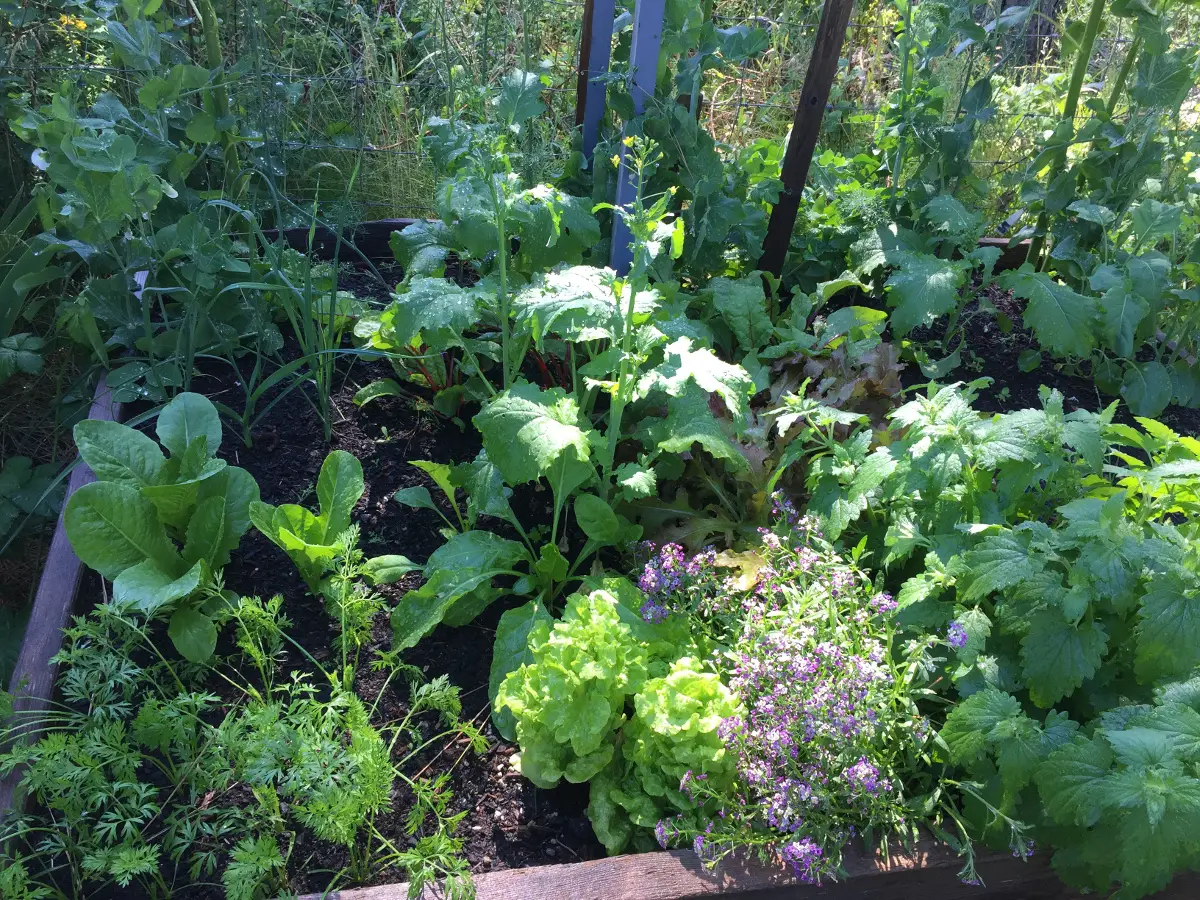
When I design my garden I like to do Polyculture Gardening using a combination of Square Foot or Intensive Gardening and Companion Planting.
I want to be able to grow the most food I can in the space that I have and this seems to work the best for us.
I like Polyculture Gardening because its utilizing a variety of plants in each area to help bring in the good predator insects.
And confuses the harmful insects to minimize the damage of your growing plants.
Now I know what you might be saying, “But I like the look of a well manicured garden in nice neat rows”.
So do I, but I like the fact that there is less chance of the damage that the hungry harmful insects can do to your beautifully planted Monoculture Garden!
When we plant a Monoculture Garden it tells these nasty pests there’s a wonderful feast just waiting for them to devour all in one spot.
But when we do a Polyculture Garden it’s much harder for them to find their favorite plant to chew on.
And provides a perfect place for the wonderful predator insects to hide!
Growing vertically in our Intensive or Square Foot Gardening when possible, uses space more efficiently than traditional methods as well.
The garden area is maximized instead of having wasted room between rows of crops which gives you more of the vegetables, fruits and flowers you grow in the smallest amount of growing space.

Vertical growing helps keep plants up off the ground, is aesthetically pleasing to the eye creating interesting focal points and makes for easier harvesting.
Growing plants up walls, trellises and fences can help provide shade for our plants that prefer to be kept cooler in the summer months.
Different plants planted in groups help to take care of each other by shading one another and helping to keep weeds out.
Where needed I’m planning to add in plants that will help to cover the soil such as Thyme, Sweet Alyssum or other low growing creeping type herbs or flowers.
This way I will also help to keep weeds down and conserve on moisture.
A nice bonus is that many plants are nitrogen-fixers so the living roots in the soil will help feed the plants around them.
Making sure to add mulch to the top of the soil will also help keep the moisture in.
I love flowers and who doesn’t, so I always make sure to place many different kinds of flowers throughout my garden beds.
Many flowers are edible as well as adding color to the garden, warding off harmful pests and of course drawing in the beneficial insects.
Did you know that by planting Sunflowers in your garden they greatly help the soil by sending down their roots to help breakup any hard soil?
I am making sure again this year to add them to most all my garden beds.
Besides, they are such beautiful flowers to behold, always turning their heads towards the sun!
Planning my garden the Intensive or Square Foot and Companion Planting method allows me to do some intercropping.
By intercropping you can grow different crops simultaneously together.
But the growth of one crop does not interfere with the growth of the others which contributes to higher yields per area.

Beans or peas growing on a trellis in your bed can shade a row or two of lettuces. sowing radishes between carrots works since the radishes can be harvested before the carrots.
There are so many possibilities.
Intercrops work best when combining opposites such as:
- the fast with the slow (radishes/leeks)
- the tall with the short (sunflowers/lettuce)
- the deep rooted with the shallow rooted (climbing peas/spinach)
- heavy feeders with light feeders (leeks/kale)
- fibrous rooted with tap rooted (lettuces/carrots)
Changing The Way We Think
The idea you want when planning your garden is to stop thinking about gardening in the conventional sense and to try and mimic the way things grow in nature.
By understanding the requirements of your crops it’s possible to plant multiple crops in the same area depending on the time of the year and the climate zone you live in.
Learning to keep something growing in the soil year around helps to build it up and keep the living organisms there effectively doubling or even tripling your yields even in a small backyard garden.
Each year your gardening areas soil will keep getting better and better when you learn to garden the no-till way and always keeping roots in the soil.
By no means have I covered all there is to know and learn…there is so much more!
It’s a never ending learning process that can be either overwhelming or enjoyable depending on how you look at it.
For me it’s a necessary part of growing our own food that I am confident is more nutrient dense.
And full of wonderful flavor that far exceeds anything we can get in the grocery stores today!
That makes it well worth the effort for me.
The side benefits you also get is good exercise, fresh air and sunshine from being out in the garden.
And don’t forget the fun you will have when you see all those wonderful plants growing up and maturing into something so lovely and so yummy!
There is such satisfaction when growing your own food!
Deciding How Many Plants To Plant
I decided last year to design my own Garden Worksheets according to the different sized beds that we have.
I’ve included three of the more common sized garden bed worksheets for you to print out if you would like to try your hand at planning your garden this way.
Free 4’X4′, 3’X5′, 2’X6′ garden bed worksheet downloads.
I find that I really like working with a pencil when filling out my worksheets so I can easily change them if a certain plant or some seeds don’t germinate.
Maybe I’ve harvested something and now want to plant something else in it’s place.
It’s easy to erase and write in the new plant.
It’s been working really well for me.
If you have never heard of Square Foot Gardening it’s easy to figure out how many plants should grow nicely in a square foot area.
On your seed packet you look for the seed/plant spacing, not the row spacing.
For instance, leaf lettuce is 6″ spacing so 4 plants will grow in a square foot space.
Carrots, radishes, parsnips are 3″ spacing = 16 plants/square foot.
Cucumbers (on a trellis) or kale are 8″ spacing = 2 plants/square foot.
Things like tomatoes, eggplant, sunflowers, broccoli, cabbage, etc. are 12″ spacing = 1 plant/square foot.
Larger plants that require 18″ – 24″ spacing like summer squash, winter squash and melons need 2 square feet/plant.
And are better suited to be at the edge of a bed and can be allowed to spill out over the side.
Some of these plants can also be trained to grow up a trellis to help save space if needed.
Sometimes it will take trial and error to find what works best for you.

I certainly have not covered all there is to know on this subject nor do I claim to have all the answers.
My hope is that I have given you some ideas you might not have thought of.
Or different ways to garden that you might not have tried that you can experiment with and see what works best for you.
For me, gardening is so much fun with great rewards even with the different failures you can get from changes in the weather and such.
Now it’s time to get on with planning our gardens and enjoy the process!
Here’s an example where I designed a plan in 2018 for one of my square raised beds that is 4′ X 4′ with plants for making a wonderful Pico De Gallo type salsa.
This gives you an idea of how I am using my garden worksheets.

Each year it’s fun to change things up so my garden is different.
Gardening is so much fun and full of enjoyment, well worth the effort!
To get a head start for a successful garden you might be interested in reading another one of my articles, “Tips On Getting An Early Start For The Spring Garden”.
Related Questions
How deep should a raised garden bed be?
Most garden plants need up to 12-14″ of root depth.
You can vary the depth of your raised beds depending on the kinds of plants you will be planting.
I like to have mine about 12-14″ and never shallower than 6″ of soil depth.
How do you enrich soil naturally?
You can add organic matter to your soil such as chicken, horse and goat manures and other composted recycled organic wastes into your soil.
Plant cover crops and also add mulch on top of your garden soil.
Do plants need space to grow, how does it affect plant growth?
When growing plants, space is a factor to consider.
Each plant has spacing requirements that give optimal growth which is determined by the species of the plant and your soil health.
Overcrowded plants can grow poorly but spaced too far apart they don’t produce the yields they could if spaced more closely.


